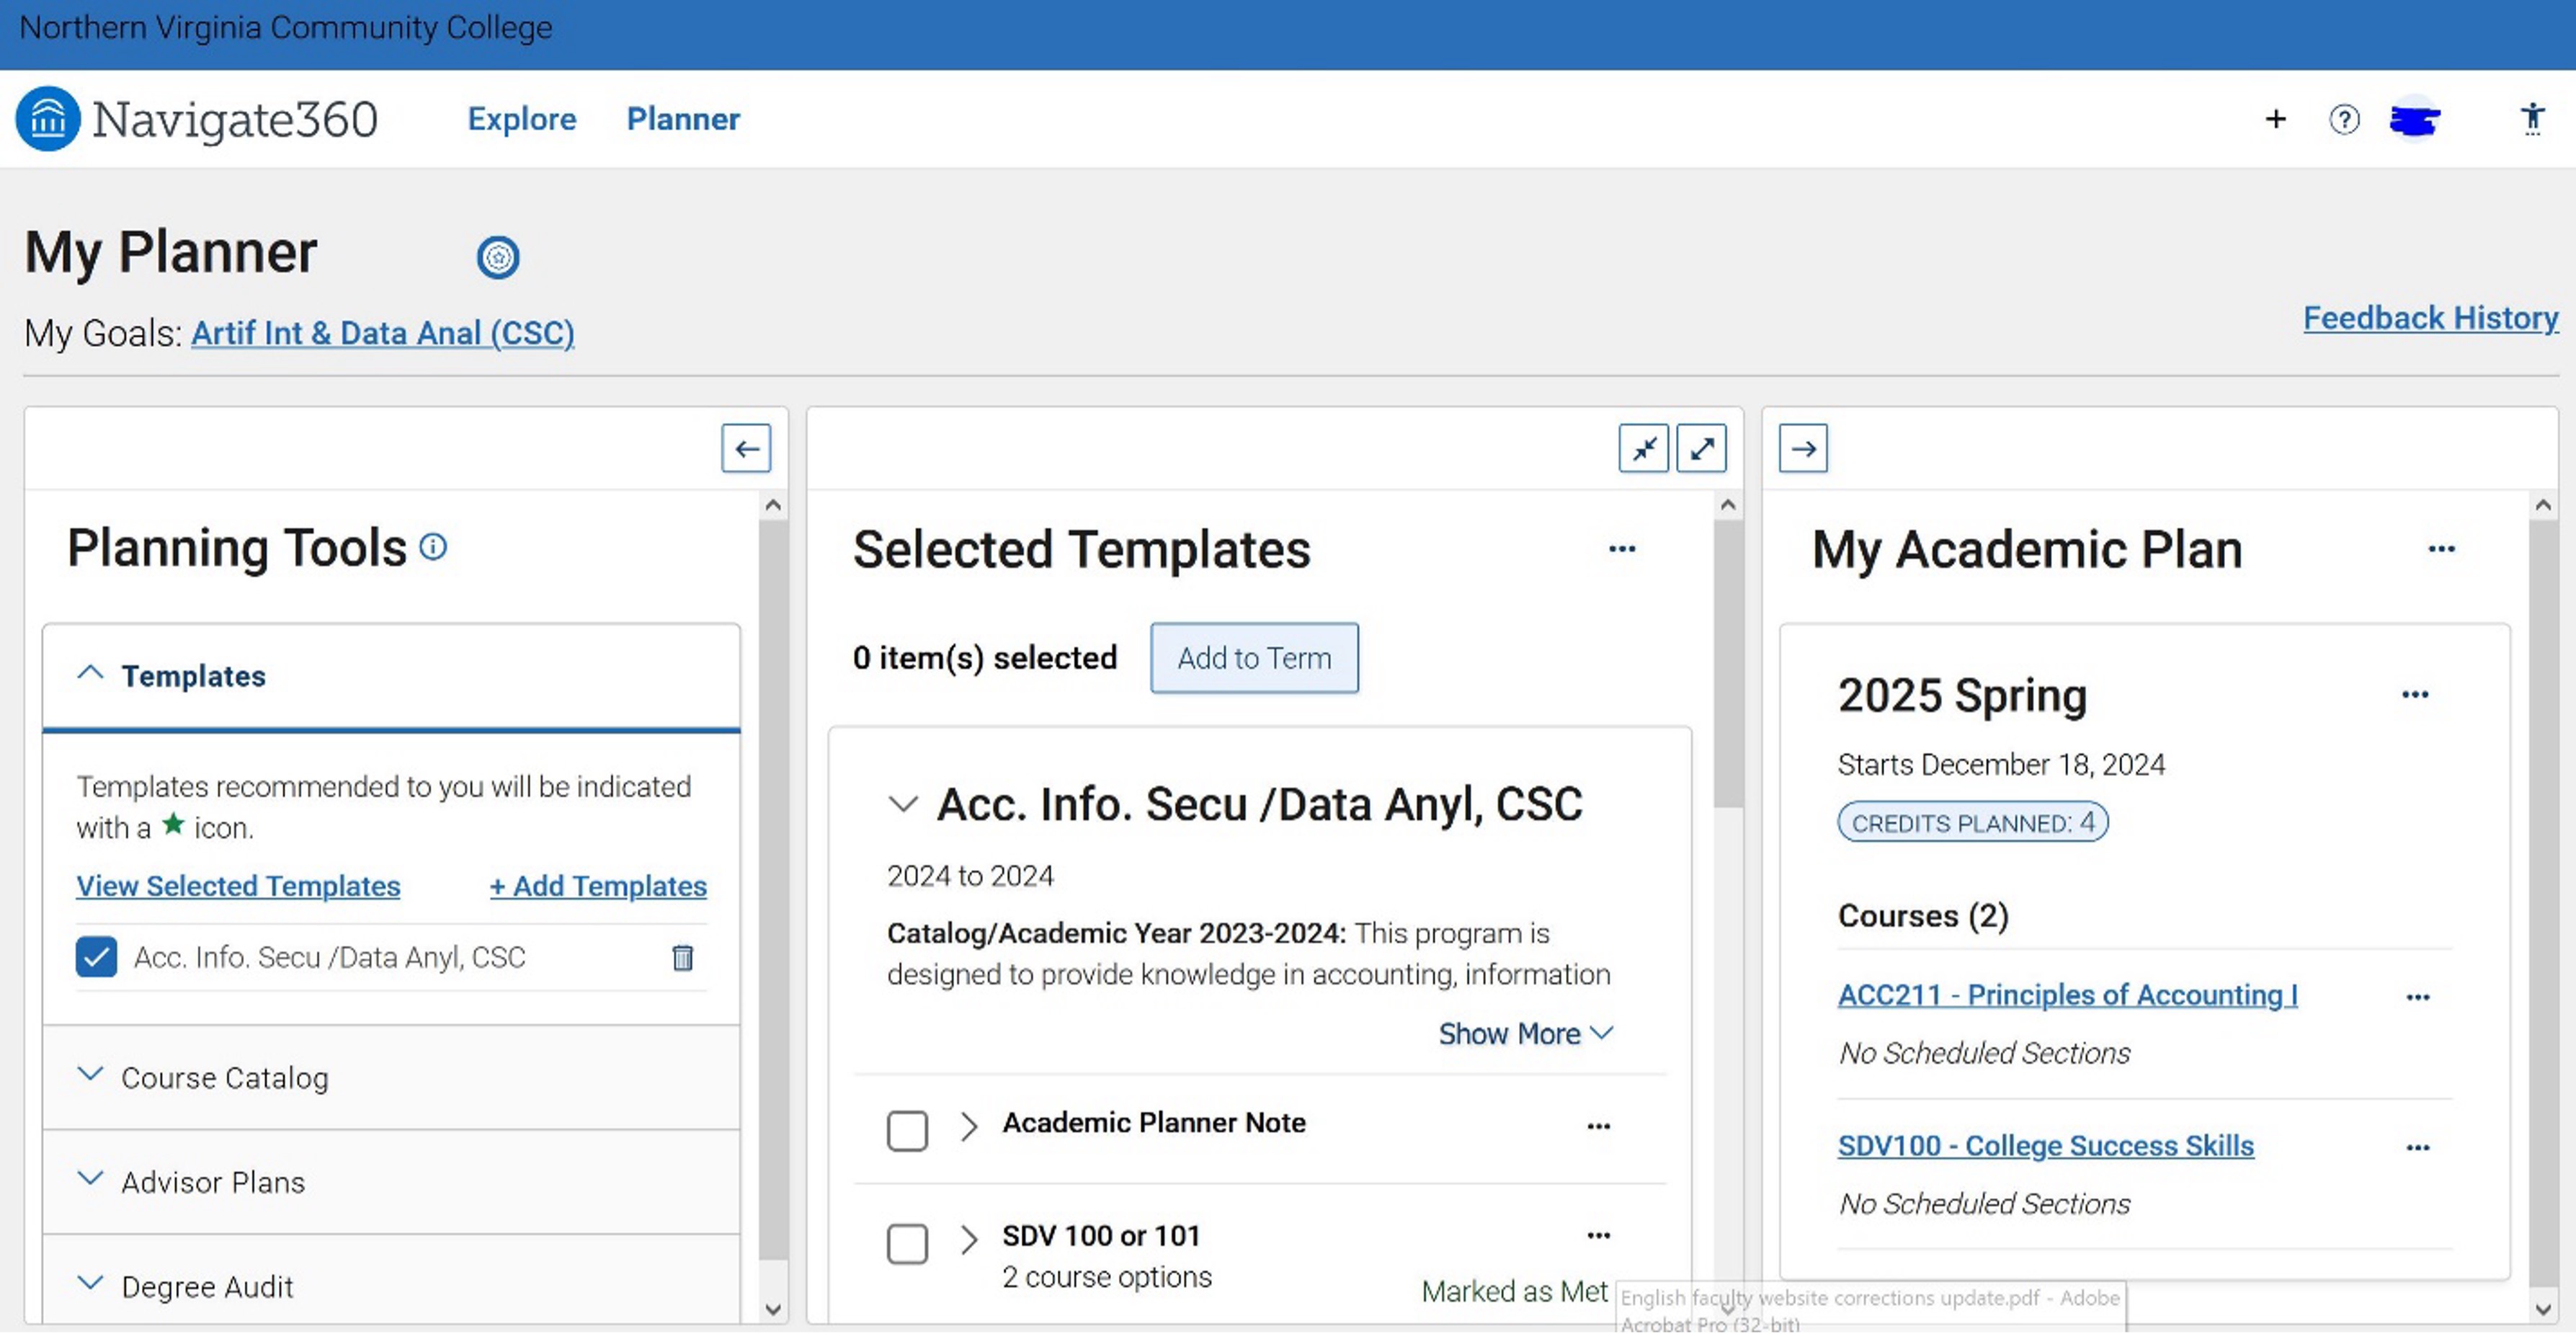
Once you place courses in your Planner, you can perform various tasks, including viewing your PLAN report, moving planned courses from one term to another, deleting courses from the Planner, and adding courses to the Planner from the course catalog or from the PLAN report.

  1. Log in to myNOVA and click SIS: Student Information Center
  2. Click My Student Information
  3. On the left dropdown of Academic Planning, click My Planner.
  4. The My Planner page will appear. It displays the courses that are in your Planner. When courses are added to the Planner, they fall into the Unassigned Courses section.
    Courses can be deleted by clicking the garbage can symbol in the Delete column or the Delete All button.
    Prerequisites can be viewed by clicking on the yes in the Prereq column.
    Note the Information symbol in the Req column. Click on the symbol to view further information about the course and where it may fit your degree requirements.
  5. Courses added to the Planner from the Plan By My Requirements report have the Information symbol in the Req column; courses added to the Planner from the Course Catalog do not have this symbol.
  6. To move courses in the Planner into a specific term, select a course by checking the box in the Select column and use the drop-down arrow to select a term. Then click the move button.
  7. The course now appears in the grid for a specific term you selected and no longer displays in the Unassigned section.
    Additional courses can be moved, and other terms can be added.

    Courses can also be added to the Planner directly from the Course Catalog.

  8. To add a course to the Planner from the catalog, click on the Browse Course Catalog button.
  9. Select a course by clicking on the correct alpha or numeric area for the course prefix.
  10. A list of all the course prefixes beginning with an A is displayed. Select the desired area. (Example: ACC - Accounting) Click on the ACC.
  11. A list of all the Accounting courses will be displayed. Click in the Select column box to select a course to move to the Planner. For procedures with multiple offerings, click on the Course Title and then select the campus.
  12. Click on the Add to Planner button.
    A message confirming the addition of the course to the Planner will appear.
    Continue adding more courses from the catalog if appropriate.
  13. Click on the My Planner tab at the top of the page and return to the Planner.
    Confirm that the new course is in the Planner in the Unassigned Courses section.
    Note that the courses added from the Browse Course Catalog do not have the Information symbol in the Req (Requirement) column. In contrast, courses added from Plan by My Requirements have the Information symbol.
  14. To see how your planned courses have satisfied requirements, click the Plan By My Requirements tab at the top.
  15. The Planner report will be displayed. Click Expand All.
    Scroll through the report to see the courses with a blue star in the Status column in the planner matching requirements. These courses in the Planner meet your program and plan (major) requirements.
    Courses do not have to be assigned to a term. The courses in the Planner satisfy requirements while in the Unassigned category.
  16. To print your planner report, click on view report as. PDF.
  17. Return to the Planner by clicking on the Plan tab or My Planner.